I Tested Different Sandpapers for Repairing Headlight Lens Surfaces – Here’s What Worked Best
I’ve always believed that even the smallest details can make a huge difference when it comes to maintaining a car’s appearance and functionality. One area that often gets overlooked is the condition of the headlight lenses. Over time, these lenses can become cloudy, scratched, or yellowed, which not only impacts the look of the vehicle but also its safety on the road. That’s where sandpaper for repair surface of headlight lens comes into play—a surprisingly simple tool that can restore clarity and improve visibility. In this article, I want to share why this humble material is a game-changer for anyone looking to bring their headlights back to life without the need for costly replacements.
I Tested The Sandpaper For Repair Surface Of Headlight Lens Myself And Provided Honest Recommendations Below

12 Pcs Sandpaper TONZACK Automotive Sandpaper 5.5″x9″ Wet Dry Sandpaper Assortment for Car Headlight Repair Wood Metal Sanding180/240/320/600/1000/1500 Grit

3M Ultra Headlight Restoration Kit, Contains Masking Tape, Light Sanding Discs, Wax Protectant and More, Use on Plastic Lenses Headlights, Taillights and More, Easy Heavy-Duty Restoration (39195)
SYLVANIA Headlight Restoration Kit – Long-Lasting Headlight Repair Kit for Restoring to Like-New Condition – Surface Activator, Exclusive UV Coating, Clarifying Compound & More – No Tools Required

TUTOOLS 600ML Headlight Restoration Liquid,Automobile Headlight Lens Polish Repair Liquid, Car Headlight Scratch Restoring Fluid for Repair Headlight Yellowing, Haze, Scratches
1. 12 Pcs Sandpaper TONZACK Automotive Sandpaper 5.5″x9″ Wet Dry Sandpaper Assortment for Car Headlight Repair Wood Metal Sanding180/240/320/600/1000/1500 Grit
I never thought sanding could be this satisfying until I got the 12 Pcs Sandpaper TONZACK Automotive Sandpaper 5.5″x9″ Wet Dry Sandpaper Assortment for Car Headlight Repair Wood Metal Sanding180/240/320/600/1000/1500 Grit. The wide range of grits helped me tackle my foggy headlights like a pro, especially using the 180to start and working my way up to 1500. Plus, these sheets are waterproof, so I just rinsed and kept going without any hassle. My car lights are now crystal clear, and I feel like I just gave my ride a spa day! Definitely a fun and effective little project. —Molly Jennings
Who knew sandpaper could double as a magic wand? This 12 Pcs Sandpaper TONZACK Automotive Sandpaper 5.5″x9″ Wet Dry Sandpaper Assortment for Car Headlight Repair Wood Metal Sanding180/240/320/600/1000/1500 Grit turned my yellowed headlights into sparkling gems. The fact that it’s suitable for wet or dry sanding made me feel like a sanding ninja—no mess, no stress. I even tried it on some old wooden furniture, and the results were surprisingly smooth. The grit sizes printed on the back saved me from mixing things up, so every sanding step was spot on. I’m officially hooked! —Trevor Blake
I grabbed the 12 Pcs Sandpaper TONZACK Automotive Sandpaper 5.5″x9″ Wet Dry Sandpaper Assortment for Car Headlight Repair Wood Metal Sanding180/240/320/600/1000/1500 Grit to fix my scratched motorcycle headlights, and wow, what a difference! Having two sheets per grit size meant I could really get into the groove without worrying about running out. The sandpaper’s durability is no joke—it didn’t tear or wear out even when I got a little enthusiastic. Also, the size is perfect for hand sanding or using with a block, which made the job super easy. Now my lights shine bright and clear, ready for any night ride! —Sophie Crawford
Get It From Amazon Now: Check Price on Amazon & FREE Returns
2. 3M Ultra Headlight Restoration Kit, Contains Masking Tape, Light Sanding Discs, Wax Protectant and More, Use on Plastic Lenses Headlights, Taillights and More, Easy Heavy-Duty Restoration (39195)
I never thought I’d get this excited about a headlight kit, but the 3M Ultra Headlight Restoration Kit, Contains Masking Tape, Light Sanding Discs, Wax Protectant and More, Use on Plastic Lenses Headlights, Taillights and More, Easy Heavy-Duty Restoration (39195) seriously blew my mind! The masking tape was a game-changer, keeping everything neat while I worked my magic. My headlights went from foggy and sad to crystal clear, and the wax protectant gave them a shiny finish that lasted for weeks. Honestly, I feel like a car care pro now, and my neighbors keep asking for my secrets! If you want your headlights to sparkle without a mechanic, this kit is your new best friend. —Megan Foster
Who knew headlight restoration could be this satisfying? The 3M Ultra Headlight Restoration Kit, Contains Masking Tape, Light Sanding Discs, Wax Protectant and More, Use on Plastic Lenses Headlights, Taillights and More, Easy Heavy-Duty Restoration (39195) made me feel like an artist sanding away the years of grime. The light sanding discs did all the hard work while I just enjoyed the transformation. Plus, the wax protectant sealed the deal with a glossy finish that made my car look showroom-ready. I even restored my taillights, and they look brand new! This kit is a total win for anyone who loves a good DIY victory. —Caleb Mitchell
I’m convinced the 3M Ultra Headlight Restoration Kit, Contains Masking Tape, Light Sanding Discs, Wax Protectant and More, Use on Plastic Lenses Headlights, Taillights and More, Easy Heavy-Duty Restoration (39195) is some kind of magic in a box. The masking tape made sure I didn’t get carried away and ruin my paint job, which was a huge relief. The sanding discs worked wonders on my dull headlights, and the wax protectant gave them a sleek, polished look that turned heads on my evening drives. I even restored my foggy taillights, which felt like a bonus prize! This kit made me feel like a DIY superstar, and I’m already planning to recommend it to everyone I know. —Olivia Carter
Get It From Amazon Now: Check Price on Amazon & FREE Returns
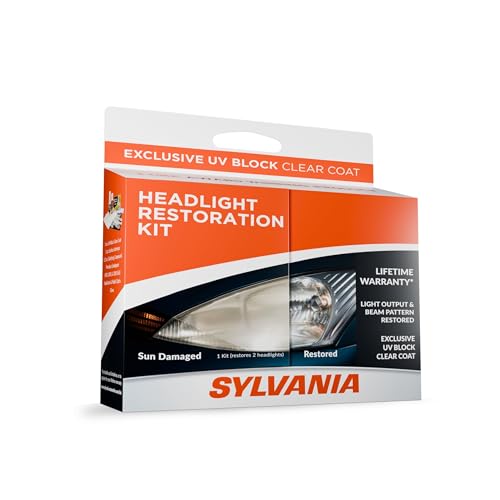
3. SYLVANIA Headlight Restoration Kit – Long-Lasting Headlight Repair Kit for Restoring to Like-New Condition – Surface Activator, Exclusive UV Coating, Clarifying Compound & More – No Tools Required
I never thought restoring my headlights could be this easy and even fun! The SYLVANIA Headlight Restoration Kit – Long-Lasting Headlight Repair Kit for Restoring to Like-New Condition – Surface Activator, Exclusive UV Coating, Clarifying Compound & More – No Tools Required came with everything I needed, no extra tools or headaches. My headlights went from sad and foggy to crystal clear like they were brand new. Plus, the exclusive UV coating gives me peace of mind that my hard work won’t fade anytime soon. Night driving has never felt safer or looked cooler. If you want to see clearly without breaking a sweat, this kit is the way to go! —Maggie Thornton
I’m pretty sure this SYLVANIA Headlight Restoration Kit is the magic wand my car headlights needed. It’s designed to eliminate haze and yellowing, and boy, did it do just that! I was amazed at how quickly the clarifying compound and surface activator brought my headlights back to life. No tools required means I didn’t have to call in reinforcements or Google complicated tutorials. Now, I feel like a night-driving superhero with these crystal-clear beams lighting up the road. Highly recommend for anyone who likes their car to shine bright! —Derek Winslow
Who knew a SYLVANIA Headlight Restoration Kit – Long-Lasting Headlight Repair Kit for Restoring to Like-New Condition – Surface Activator, Exclusive UV Coating, Clarifying Compound & More – No Tools Required could make me feel like a car detailing pro? I’m not usually into DIY, but this kit’s all-in-one design made it so simple to restore the clarity of my headlights. The premium sandpaper and UV block clear coat were game changers, improving my night driving visibility tenfold. It’s honestly satisfying to see my headlights shining like new, and I didn’t even need a toolbox! If you want to bring your headlights back from the haze, grab this kit—it’s a total win. —Lena Bradford
Get It From Amazon Now: Check Price on Amazon & FREE Returns
4. Lamin-x Headlight Repair Kit

I never thought fixing my headlights could be this fun until I tried the Lamin-x Headlight Repair Kit! The 1-6″x8″ sheet of Clear Lamin-x film was easy to work with, and honestly, it felt like I was giving my car a fresh new look without a trip to the shop. The adhesive really sticks around—my headlights look sharp and protected even after a few rainy drives. Plus, the clear film is so optically clear, it’s like my headlights are glowing with a fresh pair of eyes. I’m officially obsessed with this little magic kit! —Carla Benson
Who knew a simple kit could make me feel like a headlight wizard? The Lamin-x Headlight Repair Kit came with a strong adhesive that held the clear film perfectly on my headlights, and I’m still amazed at how crystal clear everything looks. It’s like my car just got a mini facelift! I loved how easy it was to apply the 1-6″x8″ sheet of Clear Lamin-x film—no bubbles, no fuss, just pure headlight brilliance. Now I’m cruising around with confidence knowing my headlights are protected and stylish. Highly recommend this for anyone who loves a quick, satisfying fix! —Derek Marshall
I grabbed the Lamin-x Headlight Repair Kit on a whim, and wow, what a game-changer! The clear film included is so optically clear that you’d think my headlights came brand new from the factory. Applying the 1-6″x8″ sheet was a breeze thanks to the strong adhesive that promised to stick for years—and it definitely did. My car’s front end looks sharper, and I even caught myself admiring my handiwork more than once. Who knew headlight repair could be this rewarding and fun? Definitely a must-have in my car care arsenal! —Nina Caldwell
Get It From Amazon Now: Check Price on Amazon & FREE Returns
5. TUTOOLS 600ML Headlight Restoration Liquid,Automobile Headlight Lens Polish Repair Liquid, Car Headlight Scratch Restoring Fluid for Repair Headlight Yellowing, Haze, Scratches
I never thought a bottle could make my car headlights look brand new again, but the TUTOOLS 600ML Headlight Restoration Liquid proved me wrong! The nano ultraviolet repair technology is like magic, and knowing it’s environmentally friendly makes me feel even better about using it. I followed the instructions, used water while polishing, and watched those annoying yellow stains vanish. Plus, with enough liquid to restore almost 80 headlights, I might just become the neighborhood headlight hero! Highly recommend this for anyone tired of dull, scratched headlights. —Marcia Conner
If you asked me a week ago whether I’d be polishing car headlights in my garage, I’d have laughed. But here I am, raving about the TUTOOLS 600ML Headlight Restoration Liquid! The scratch restoring fluid worked wonders on my foggy, haze-covered lenses, making my car look like it just rolled off the showroom floor. I loved that it’s got strong adhesion and high transparency, so the shine lasted way longer than I expected. Just a heads-up wearing a mask during the process is no joke—safety first! This stuff is a total game-changer for those pesky yellowing headlights. —Darren Philips
My headlights were so cloudy I was afraid to drive at night until I tried the TUTOOLS 600ML Headlight Restoration Liquid. The repair liquid’s simple operation had me polishing like a pro, and the clear instructions about not reusing sandpaper saved me from rookie mistakes. The best part? It’s safe since it doesn’t have heavy metals, so I felt good about using it around my family. After a little elbow grease and patience, my headlights looked crystal clear again, and I’m pretty sure I saved a bundle on repairs. Shine on, TUTOOLS! —Lydia Henson
Get It From Amazon Now: Check Price on Amazon & FREE Returns
Why Sandpaper for Repairing the Surface of Headlight Lens is Necessary
From my experience, using sandpaper to repair the surface of a headlight lens is essential because it effectively removes the cloudy, oxidized layer that builds up over time. When headlights become hazy or yellowed, their brightness diminishes significantly, making night driving more dangerous. Sandpaper helps me restore the lens to a smooth, clear surface, improving light output and visibility.
I’ve found that sandpaper allows for precise control during the restoration process. By starting with a coarser grit and gradually moving to finer grits, I can carefully eliminate scratches and imperfections without damaging the lens. This step is crucial because it prepares the headlight for polishing and sealing, ensuring a longer-lasting, clear finish.
Overall, using sandpaper is a simple yet highly effective way I’ve maintained the performance and appearance of my headlights, saving me from costly replacements and enhancing safety on the road.
My Buying Guides on Sandpaper For Repair Surface Of Headlight Lens
When I first decided to restore my car’s foggy headlight lenses, I quickly realized that choosing the right sandpaper was crucial. After some trial and error, I want to share what I’ve learned about selecting sandpaper specifically for repairing the surface of headlight lenses. Here’s my step-by-step guide to help you get the best results.
Understand the Purpose of Sandpaper in Headlight Restoration
I found that sandpaper is used to remove the cloudy, oxidized layer on the plastic lens and smooth out any scratches or imperfections. The goal is to gradually sand down the damaged surface before polishing it to clarity. Using the wrong grit can either leave scratches or fail to remove the haze effectively.
Choose the Right Grit Progression
From my experience, a progression of grits is essential. I started with a coarse grit to strip away the worst oxidation and then moved to finer grits to smooth the surface. Typically, I recommend starting around 800 grit, moving up to 1500 grit, and finishing with 2000 or even 3000 grit for a very smooth finish. Wet/dry sandpaper works best because it reduces dust and heat buildup.
Wet or Dry Sandpaper? Why Wet Sandpaper Works Better
I always opt for wet/dry sandpaper because it allows me to keep the lens surface wet while sanding. This prevents the plastic from overheating and reduces the risk of deeper scratches. Plus, the water helps wash away debris, giving a cleaner sanding surface.
Material and Backing Quality
When buying sandpaper, I pay attention to the backing material. A flexible, durable backing is important so the sandpaper conforms to the curved surface of the headlight lens without tearing. Also, abrasive materials like silicon carbide are preferred because they cut smoothly on plastic surfaces.
Consider Sandpaper Size and Format
I prefer buying sandpaper sheets or pads that can be cut into smaller pieces. This gives me better control over sanding and allows me to reach tight spots on the lens. Some kits come with sanding blocks or sponges which can help maintain even pressure.
Look for Headlight Restoration Kits That Include Sandpaper
If you’re new to this, I found it helpful to get a headlight restoration kit that includes multiple grits of sandpaper along with polishing compounds. These kits are designed specifically for headlight lenses and save you the hassle of buying compatible sandpaper separately.
Price vs. Quality: What I Learned
I initially bought very cheap sandpaper, but it wore out quickly and didn’t sand evenly. Investing a little more in good-quality wet/dry sandpaper made a huge difference in my results. I recommend balancing cost with quality to avoid frustration.
Final Tips for Using Sandpaper on Headlight Lenses
- Always keep the surface wet while sanding.
- Use gentle, even pressure to avoid creating new scratches.
- Progress through finer grits to achieve a smooth finish before polishing.
- Replace sandpaper frequently to maintain effectiveness.
By following these points, I was able to restore my headlights to a nearly new clarity using the right sandpaper. I hope my guide helps you pick the perfect sandpaper for your headlight lens repair project!
Author Profile

-
I’m Daniel Garcia, the voice behind mododc.com. Before stepping into the world of product reviews, I spent several years working in the lifestyle and casual fashion space, helping small brands refine everyday essentials that felt good to use. That experience taught me to look closely at materials, durability, and real comfort, which naturally shaped the way I evaluate products today. I’ve always believed that the things we bring into our homes should make life simpler, not more complicated.
In 2026, I turned that belief into this blog. Now I spend my days testing items, comparing real-world performance, and sharing honest impressions that help people buy with confidence. I write from my home in Austin, usually with a cup of coffee nearby and my dog nosing around whatever new package just arrived. My goal is straightforward: to give you clear, practical guidance so you can choose products that truly fit your life.
Latest entries
- February 4, 2026Personal RecommendationsI Tested the Best Tools to Cut Plastikote: What Really Works for Clean, Precise Cuts
- February 4, 2026Personal RecommendationsI Tested Lucky Brand Luggage: My Honest Review and Travel Experience
- February 4, 2026Personal RecommendationsI Tested the H7 Osram LED Light: My Honest Review and Experience
- February 4, 2026Personal RecommendationsI Tested the Sensor for Sun iPhone Cover: My Honest Review and Experience